Algorand for Beginners 1 – How to set up a development environment for Algorand? | Nextrope Academy

Paulina Lewandowska

27 Sep 2022
Algorand for Beginners 1 – How to set up a development environment for Algorand? | Nextrope Academy

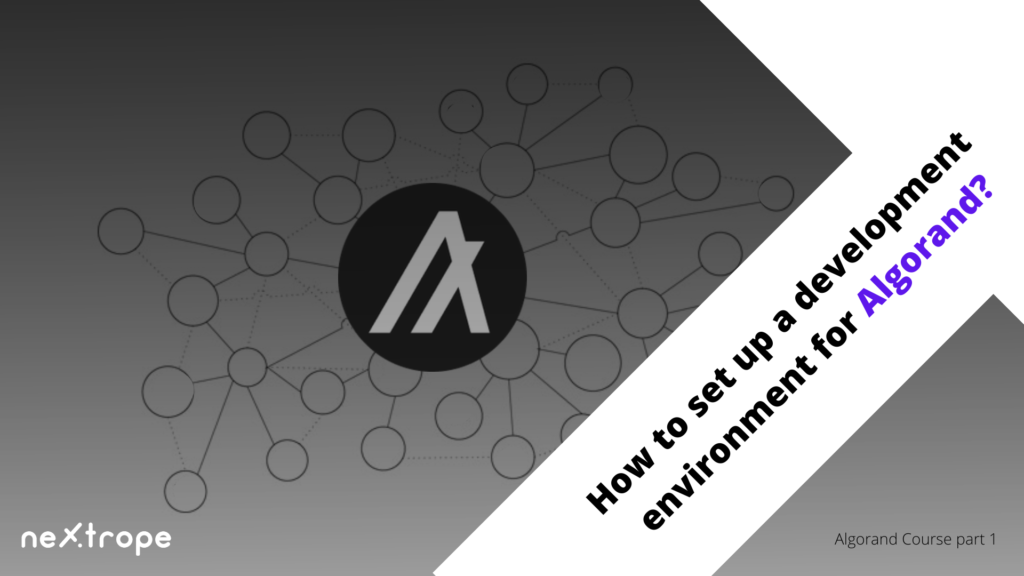
In this article we start our series of articles that form the Algorand course for beginners. From the series of articles you will learn, among other things, how to set up a development environment for Algorand, how to deploy a smart contract on the Algorand network of your choice, how to write a simple smart contract, and what tools and frameworks you can use to work with the Algorand blockchain.

Algorand is a "green blockchain" launched in 2019, with the overarching goal of solving the blockchain trilemma through transaction speed, security, and a consensus algorithm that ensures full decentralization of the network.

A list of the necessary tools and components:

  • Visual Studio Code
  • Python 3.6 or later
  • pyTeal library and py-teal-sdk
  • Docker Desktop
  • Algorand Sandbox
  • Skeleton project repository

Visual Studio Code installation

Visual Studio Code will be your IDE, with the help of this program you will be able to write application code.

Visual Studio Code (known as VS Code) is a free and open source text editor from Microsoft. VS Code is available for operating systems: Windows, Linux and macOS. Although the editor is relatively lightweight, it includes several advanced features that have made VS Code one of the most popular development environment tools in recent times.

  • Go to https://code.visualstudio.com/download  and download the installation file compatible with your operating system.
  • Install Visual Studio Code on your computer and proceed to the next step in this tutorial.

Installing Python

Python is a general-purpose, high-level interpreted programming language commonly used for web development, data analysis and automation.

One way to write smart contract logic for the Algorand network is with the Python library pyTeal ( https://pyteal.readthedocs.io/en/stable/ ), which allows you to write smart contract logic in python and compile the code into the TEAL code required by the AVM (Algorand Virtual Machine).

  • TEAL is an assembly language syntax for specifying a program that is eventually converted to AVM (Algorand Virtual Machine) byte code.
  • In VS Code, go to the "Extensions" tab used to install add-ons for Our IDE.

In the search bar, type "Python" and install Python extension for VS Code.

The next step is to install the interpreter for Python. This process varies depending on the operating system you are using.

Windows:

  • Download the installer for the language version of your choice from the official Python website https://www.python.org/downloads/ then go through the standard installation process,
  • An alternative to the above method is to install Python from the Microsoft Store, all the latest versions of python are available there.

MacOS:

  • To install the Python interpreter on macOS, we need to use the Homebrew package manager,
  • If Homebrew is already installed, open the command line and enter the command brew install python3.

On Linux distributions, the Python 3.x interpreter is installed by default.

After installing Python, it's a good idea to check that everything went as expected. To see the currently installed version of the interpreter, enter the command at the command line

python -v

Installing Docker Desktop

Docker Desktop is an easy-to-install application for macOS, Linux and Windows environments that allows you to create and share containerized applications and microservices.

Docker Desktop is required by the Algorand sandbox, a toolkit provided by the Algorand developers that is, a must-have, for any Algorand developer no matter what his or her level of expertise. Without Docker Desktop, you won't be able to run the most important tool for Algorand developers.

Installation files for each environment are available here.

After installation, Docker Desktop will start automatically.

Downloading Algorand Sandbox

Algorand sandbox is a set of tools that facilitate communication and interaction with the Algorand blockchain. Components of the sandbox include indexer, goal and algod.

With sandbox you can run betanet, testnet and mainnet in network mode, create tokens, nodes, execute transactions, create wallet addresses, check account balances, or deploy your applications on the network of your choice.

  • Go to https://github.com/algorand/sandbox and copy the link to the sandbox repository
  • Then open the command line on your computer, navigate to the desired location and enter the command git clone <repository address>
  • The sandbox repository will be cloned to your computer and you can start using it right away

Downloading the repository skeleton

To get started with Algorand easily enough, you should use the project skeleton, prepared by the Algorand development team.

Running Python (venv)

Python venv is a virtual Python environment in which the Python interpreter, libraries and scripts installed in it are isolated from those installed in other virtual environments and (by default) any libraries installed in "system" Python, i.e. one that is installed as part of the operating system.

To run a virtual Python environment follow a few simple steps:

  • Open the previously downloaded project skeleton in VS Code and start the terminal,
  • Make sure you are in the root directory of the project and enter the command python -m venv venv, the python virtual environment will be created with the name "venv",
  • Then depending on the operating system you are using, enter another command to activate the virtual environment:
  • MacOS: source ./venv/bin/activate
  • Windows: source ./venv/Scripts/activate,
  • To make sure you are working on the correct virtual environment, check that the name of your virtual environment appears before the command line in the terminal.

Installing additional libraries

In the example project in the requirements.txt folder, there are additional libraries that you need to install to start writing code for your application using the pyTeal library.

PyTeal is a Python language library for constructing Algorand smart contracts. It was created as a community project. The main goal of this library is to make writing contracts even easier and more accessible for programmers who prefer programming in Python.

  • To install additional libraries into your virtual environment you need to put is in the project's root directory in the requirements.txt file,
  • The most important libraries that we will use when writing smart contracts for Algorand are pyTeal and py-teal-sdk,
  • Once you have the requirements.txt file enter the following command to start installing additional libraries, pip install -r ./requirements.txt .

Linking your project to a sandbox

When creating your blockchain application, after some time you may need, for example, to deploy it on a network of your choice. For this task you will need the Algorand sandbox, but first you need to properly connect your project to the sandbox by pointing it to the location of Our Project, among other things.

To do this, navigate to the folder where the Algorand sandbox you downloaded earlier is located and follow the instructions below:

  • Open the docker-compose.yml file and in the services.algod section enter the additional volumes key with three additional parameters:
  • -type: bind,
  • source: <path to your project>,
  • target: /data,
  • example in the graphic below:

Starting the Algorand sandbox

To interact with the Algorand blockchain using the sandbox, you must first launch the sandbox container in Docker Desktop application.

To do so, follow the instructions below:

Open the command line on your computer and navigate to the folder of the sandbox you downloaded earlier,

Then enter the command ./sandbox up to start the sandbox container and place it in Docker,

By default, the sandbox will be started with betanet support. To run the sandbox with support for another network enter  ./sandbox up testnet or ./sandbox up mainnet .

Summary

With all the above steps completed, you have a ready-made environment to start working with the pyTeal library. You can now start writing your first smart contract, and deploy it on the network of your choice.

In the next article, we will introduce you to writing the simplest smart contract, along with deploying it on the Algorand network.

Tagi

Most viewed


Never miss a story

Stay updated about Nextrope news as it happens.

You are subscribed

Token Engineering Process

Kajetan Olas

13 Apr 2024
Token Engineering Process

Token Engineering is an emerging field that addresses the systematic design and engineering of blockchain-based tokens. It applies rigorous mathematical methods from the Complex Systems Engineering discipline to tokenomics design.

In this article, we will walk through the Token Engineering Process and break it down into three key stages. Discovery Phase, Design Phase, and Deployment Phase.

Discovery Phase of Token Engineering Process

The first stage of the token engineering process is the Discovery Phase. It focuses on constructing high-level business plans, defining objectives, and identifying problems to be solved. That phase is also the time when token engineers first define key stakeholders in the project.

Defining the Problem

This may seem counterintuitive. Why would we start with the problem when designing tokenomics? Shouldn’t we start with more down-to-earth matters like token supply? The answer is No. Tokens are a medium for creating and exchanging value within a project’s ecosystem. Since crypto projects draw their value from solving problems that can’t be solved through TradFi mechanisms, their tokenomics should reflect that. 

The industry standard, developed by McKinsey & Co. and adapted to token engineering purposes by Outlier Ventures, is structuring the problem through a logic tree, following MECE.
MECE stands for Mutually Exclusive, Collectively Exhaustive. Mutually Exclusive means that problems in the tree should not overlap. Collectively Exhaustive means that the tree should cover all issues.

In practice, the “Problem” should be replaced by a whole problem statement worksheet. The same will hold for some of the boxes.
A commonly used tool for designing these kinds of diagrams is the Miro whiteboard.

Identifying Stakeholders and Value Flows in Token Engineering

This part is about identifying all relevant actors in the ecosystem and how value flows between them. To illustrate what we mean let’s consider an example of NFT marketplace. In its case, relevant actors might be sellers, buyers, NFT creators, and a marketplace owner. Possible value flow when conducting a transaction might be: buyer gets rid of his tokens, seller gets some of them, marketplace owner gets some of them as fees, and NFT creators get some of them as royalties.

Incentive Mechanisms Canvas

The last part of what we consider to be in the Discovery Phase is filling the Incentive Mechanisms Canvas. After successfully identifying value flows in the previous stage, token engineers search for frictions to desired behaviors and point out the undesired behaviors. For example, friction to activity on an NFT marketplace might be respecting royalty fees by marketplace owners since it reduces value flowing to the seller.

source: https://www.canva.com/design/DAFDTNKsIJs/8Ky9EoJJI7p98qKLIu2XNw/view#7

Design Phase of Token Engineering Process

The second stage of the Token Engineering Process is the Design Phase in which you make use of high-level descriptions from the previous step to come up with a specific design of the project. This will include everything that can be usually found in crypto whitepapers (e.g. governance mechanisms, incentive mechanisms, token supply, etc). After finishing the design, token engineers should represent the whole value flow and transactional logic on detailed visual diagrams. These diagrams will be a basis for creating mathematical models in the Deployment Phase. 

Token Engineering Artonomous Design Diagram
Artonomous design diagram, source: Artonomous GitHub

Objective Function

Every crypto project has some objective. The objective can consist of many goals, such as decentralization or token price. The objective function is a mathematical function assigning weights to different factors that influence the main objective in the order of their importance. This function will be a reference for machine learning algorithms in the next steps. They will try to find quantitative parameters (e.g. network fees) that maximize the output of this function.
Modified Metcalfe’s Law can serve as an inspiration during that step. It’s a framework for valuing crypto projects, but we believe that after adjustments it can also be used in this context.

Deployment Phase of Token Engineering Process

The Deployment Phase is final, but also the most demanding step in the process. It involves the implementation of machine learning algorithms that test our assumptions and optimize quantitative parameters. Token Engineering draws from Nassim Taleb’s concept of Antifragility and extensively uses feedback loops to make a system that gains from arising shocks.

Agent-based Modelling 

In agent-based modeling, we describe a set of behaviors and goals displayed by each agent participating in the system (this is why previous steps focused so much on describing stakeholders). Each agent is controlled by an autonomous AI and continuously optimizes his strategy. He learns from his experience and can mimic the behavior of other agents if he finds it effective (Reinforced Learning). This approach allows for mimicking real users, who adapt their strategies with time. An example adaptive agent would be a cryptocurrency trader, who changes his trading strategy in response to experiencing a loss of money.

Monte Carlo Simulations

Token Engineers use the Monte Carlo method to simulate the consequences of various possible interactions while taking into account the probability of their occurrence. By running a large number of simulations it’s possible to stress-test the project in multiple scenarios and identify emergent risks.

Testnet Deployment

If possible, it's highly beneficial for projects to extend the testing phase even further by letting real users use the network. Idea is the same as in agent-based testing - continuous optimization based on provided metrics. Furthermore, in case the project considers airdropping its tokens, giving them to early users is a great strategy. Even though part of the activity will be disingenuine and airdrop-oriented, such strategy still works better than most.

Time Duration

Token engineering process may take from as little as 2 weeks to as much as 5 months. It depends on the project category (Layer 1 protocol will require more time, than a simple DApp), and security requirements. For example, a bank issuing its digital token will have a very low risk tolerance.

Required Skills for Token Engineering

Token engineering is a multidisciplinary field and requires a great amount of specialized knowledge. Key knowledge areas are:

  • Systems Engineering
  • Machine Learning
  • Market Research
  • Capital Markets
  • Current trends in Web3
  • Blockchain Engineering
  • Statistics

Summary

The token engineering process consists of 3 steps: Discovery Phase, Design Phase, and Deployment Phase. It’s utilized mostly by established blockchain projects, and financial institutions like the International Monetary Fund. Even though it’s a very resource-consuming process, we believe it’s worth it. Projects that went through scrupulous design and testing before launch are much more likely to receive VC funding and be in the 10% of crypto projects that survive the bear market. Going through that process also has a symbolic meaning - it shows that the project is long-term oriented.

If you're looking to create a robust tokenomics model and go through institutional-grade testing please reach out to contact@nextrope.com. Our team is ready to help you with the token engineering process and ensure your project’s resilience in the long term.

FAQ

What does token engineering process look like?

  • Token engineering process is conducted in a 3-step methodical fashion. This includes Discovery Phase, Design Phase, and Deployment Phase. Each of these stages should be tailored to the specific needs of a project.

Is token engineering meant only for big projects?

  • We recommend that even small projects go through a simplified design and optimization process. This increases community's trust and makes sure that the tokenomics doesn't have any obvious flaws.

How long does the token engineering process take?

  • It depends on the project and may range from 2 weeks to 5 months.

What is Berachain? 🐻 ⛓️ + Proof-of-Liquidity Explained

Karolina

18 Mar 2024
What is Berachain? 🐻 ⛓️ + Proof-of-Liquidity Explained

Enter Berachain: a high-performance, EVM-compatible blockchain that is set to redefine the landscape of decentralized applications (dApps) and blockchain services. Built on the innovative Proof-of-Liquidity consensus and leveraging the robust Polaris framework alongside the CometBFT consensus engine, Berachain is poised to offer an unprecedented blend of efficiency, security, and user-centric benefits. Let's dive into what makes it a groundbreaking development in the blockchain ecosystem.

What is Berachain?

Overview

Berachain is an EVM-compatible Layer 1 (L1) blockchain that stands out through its adoption of the Proof-of-Liquidity (PoL) consensus mechanism. Designed to address the critical challenges faced by decentralized networks. It introduces a cutting-edge approach to blockchain governance and operations.

Key Features

  • High-performance Capabilities. Berachain is engineered for speed and scalability, catering to the growing demand for efficient blockchain solutions.
  • EVM Compatibility. It supports all Ethereum tooling, operations, and smart contract languages, making it a seamless transition for developers and projects from the Ethereum ecosystem.
  • Proof-of-Liquidity.This novel consensus mechanism focuses on building liquidity, decentralizing stake, and aligning the interests of validators and protocol developers.

MUST READ: Docs

EVM-Compatible vs EVM-Equivalent

EVM-Compatible

EVM compatibility means a blockchain can interact with Ethereum's ecosystem to some extent. It can interact supporting its smart contracts and tools but not replicating the entire EVM environment.

EVM-Equivalent

An EVM-equivalent blockchain, on the other hand, aims to fully replicate Ethereum's environment. It ensures complete compatibility and a smooth transition for developers and users alike.

Berachain's Position

Berachain can be considered an "EVM-equivalent-plus" blockchain. It supports all Ethereum operations, tooling, and additional functionalities that optimize for its unique Proof-of-Liquidity and abstracted use cases.

Berachain Modular First Approach

At the heart of Berachain's development philosophy is the Polaris EVM framework. It's a testament to the blockchain's commitment to modularity and flexibility. This approach allows for the easy separation of the EVM runtime layer, ensuring that Berachain can adapt and evolve without compromising on performance or security.

Proof Of Liquidity Overview

High-Level Model Objectives

  • Systemically Build Liquidity. By enhancing trading efficiency, price stability, and network growth, Berachain aims to foster a thriving ecosystem of decentralized applications.
  • Solve Stake Centralization. The PoL consensus works to distribute stake more evenly across the network, preventing monopolization and ensuring a decentralized, secure blockchain.
  • Align Protocols and Validators. Berachain encourages a symbiotic relationship between validators and the broader protocol ecosystem.

Proof-of-Liquidity vs Proof-of-Stake

Unlike traditional Proof of Stake (PoS), which often leads to stake centralization and reduced liquidity, Proof of Liquidity (PoL) introduces mechanisms to incentivize liquidity provision and ensure a fairer, more decentralized network. Berachain separates the governance token (BGT) from the chain's gas token (BERA) and incentives liquidity through BEX pools. Berachain's PoL aims to overcome the limitations of PoS, fostering a more secure and user-centric blockchain.

Berachain EVM and Modular Approach

Polaris EVM

Polaris EVM is the cornerstone of Berachain's EVM compatibility, offering developers an enhanced environment for smart contract execution that includes stateful precompiles and custom modules. This framework ensures that Berachain not only meets but exceeds the capabilities of the traditional Ethereum Virtual Machine.

CometBFT

The CometBFT consensus engine underpins Berachain's network, providing a secure and efficient mechanism for transaction verification and block production. By leveraging the principles of Byzantine fault tolerance (BFT), CometBFT ensures the integrity and resilience of the Berachain blockchain.

Conclusion

Berachain represents a significant leap forward in blockchain technology, combining the best of Ethereum's ecosystem with innovative consensus mechanisms and a modular development approach. As the blockchain landscape continues to evolve, Berachain stands out as a promising platform for developers, users, and validators alike, offering a scalable, efficient, and inclusive environment for decentralized applications and services.

Resources

For those interested in exploring further, a wealth of resources is available, including the Berachain documentation, GitHub repository, and community forums. It offers a compelling vision for the future of blockchain technology, marked by efficiency, security, and community-driven innovation.

FAQ

How is Berachain different?

  • It integrates Proof-of-Liquidity to address stake centralization and enhance liquidity, setting it apart from other blockchains.

Is Berachain EVM-compatible?

  • Yes, it supports Ethereum's tooling and smart contract languages, facilitating easy migration of dApps.

Can it handle high transaction volumes?

  • Yes, thanks to the Polaris framework and CometBFT consensus engine, it's built for scalability and high throughput.